Wireshark Custom Columns For Wireless Captures
In previous articles, I’ve covered a few aspects of wireless frame capture using Wireshark, looking at subjects such as frame colourization and radio tap headers. In this article, I look at another way of improving the visualization of wireless frame captures by adding columns to our Wireshark frame summary, including customised columns that use 802.11 frame field values.
Background
By default, a typical 802.11 capture in Wireshark looks something like the screen-shot presented below (assuming you added the colourization rules I previously blogged about):
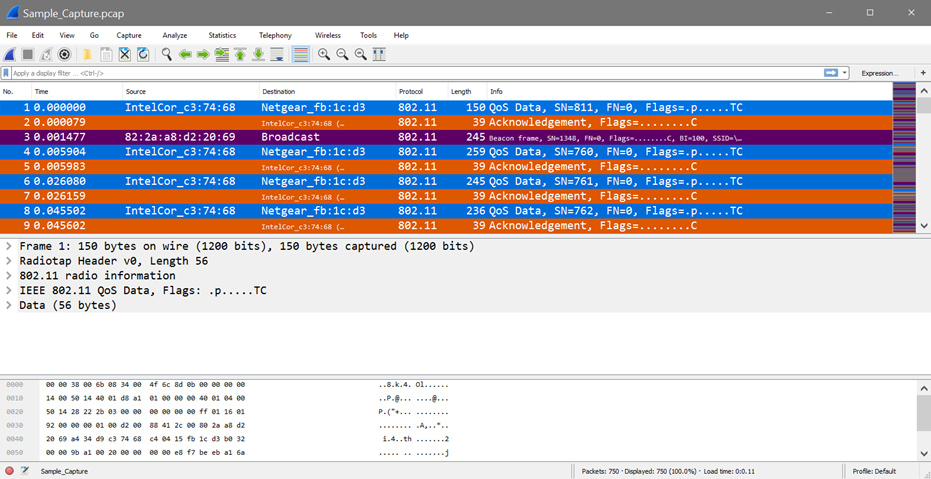
Although we get a nice summary of the frame types that are whizzing by, it would be useful if we could get a little more summarized information, before we dive into the detail of each frame. In a wireless environment, there are many more considerations compared to the wired world when we’re looking at frame captures. In addition to the information around frame timings, addressing, types etc. I’m always interested to know wireless-specific information such as:
- What signal strength was this frame seen at?
- What PHY types are being used on this network?
- Are the QoS data frames being correctly marked in the 802.11 frame headers?
- What physical speeds are being used on this network?
By applying some customisation to Wireshark, we can summarise these pieces of information in our frame summary through the addition of new columns.
Pre-defined Column Headers
So, how do we perform this magic and improve our frame capture summary?
First, let’s add a couple of pre-defined column headers that are already easily available without too much effort within Wireshark.
To customize the columns displayed, right click on column bar and select “Column Preferences”, or use the Wireshark menu-bar option: Edit > Preferences > Columns. Once selected, the panel below will be displayed:
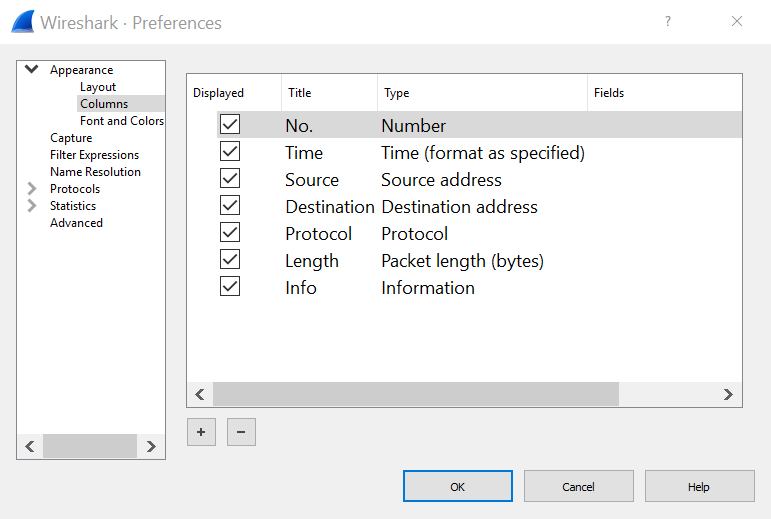
We’d like to add new columns to show the RSSI (Received Signal Strength Indicator) and transmission rate of each frame. Follow these steps to add the two new columns:
- Hit the “+” button
- A new entry will appear displaying the following information: Title: New Column, type: Number.
- Double click on the “New Column” field and enter the name of “RSSI”
- Double click on the “Number” field and change the type to “IEEE 802.11 RSSI” using the drop-down that appears
- Hit “+” again. Another new entry will appear
- Repeat the process, but add a title of “TX rate” and a type of “IEEE 802.11 Tx rate” from the drop-down options.
- Finally, drag the two new column definitions so that that appear above the “Info” field in the column listing, as shown below:
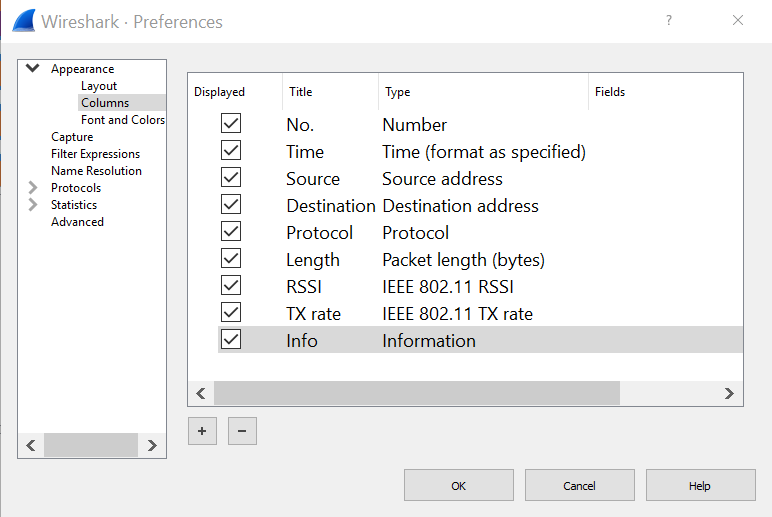
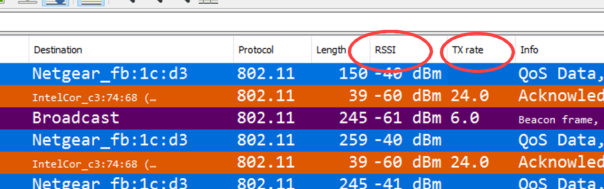
Finally, how hit the “OK” button and see the new columns appear in your Wireshark display:
Custom Column Headers
There are a couple more columns I’d like to add to the frame summary, but they aren’t available as pre-defined column values within Wireshark. Luckily, Wireshark has a superb feature that allows us to select any field value within our capture and turn it into a custom column. We’ll use this to create two additional columns to show us the PHY type of each frame and the QoS setting of our data frames.
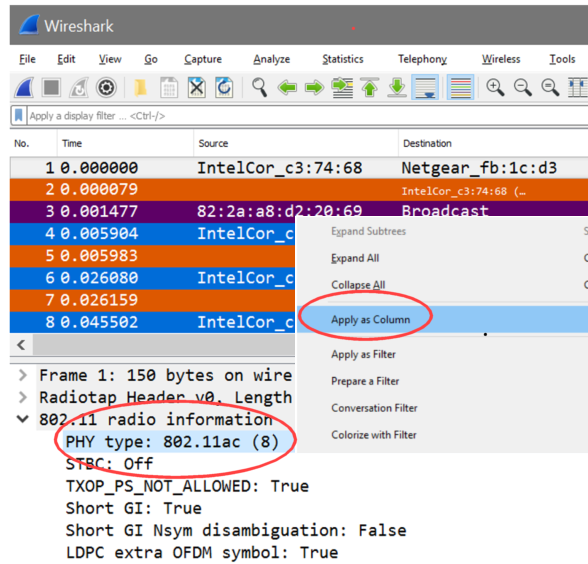
For this operation, we need to initially select a QoS Data frame in our frame summary, then perform the following operations (see figure below):
- In the decode panel, snap open the “802.11 radio information” section of the decode
- Select the “PHY type” field
- Right click and select “Apply as Column” using the pop-up panel that appears
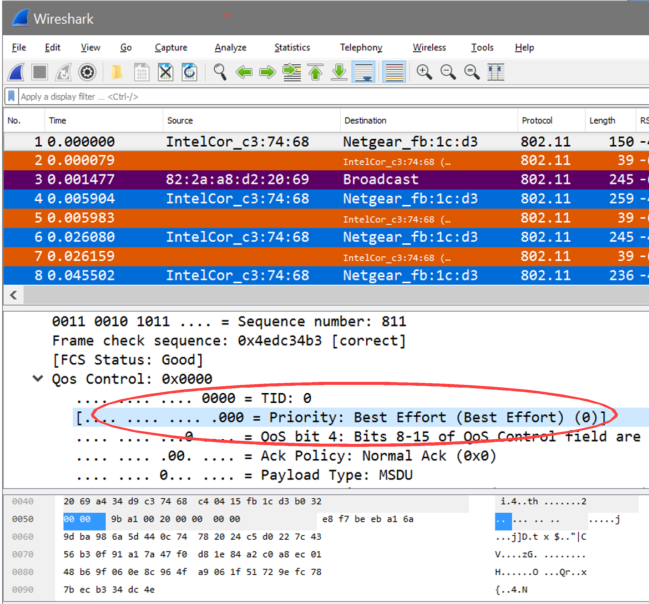
Next:
- Snap open the “IEEE 802.11” section of the decode panel
- Snap open the “QoS Control” section
- Right click on the “Priority” field and add this as a column:
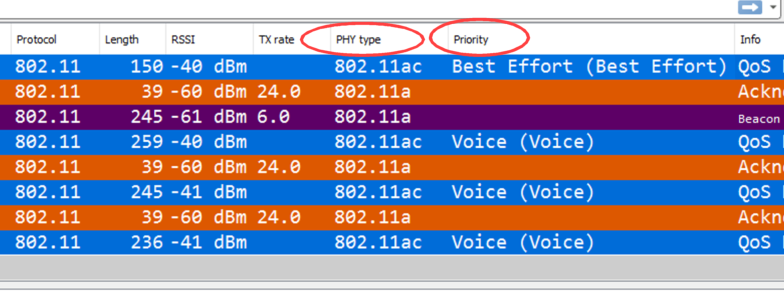
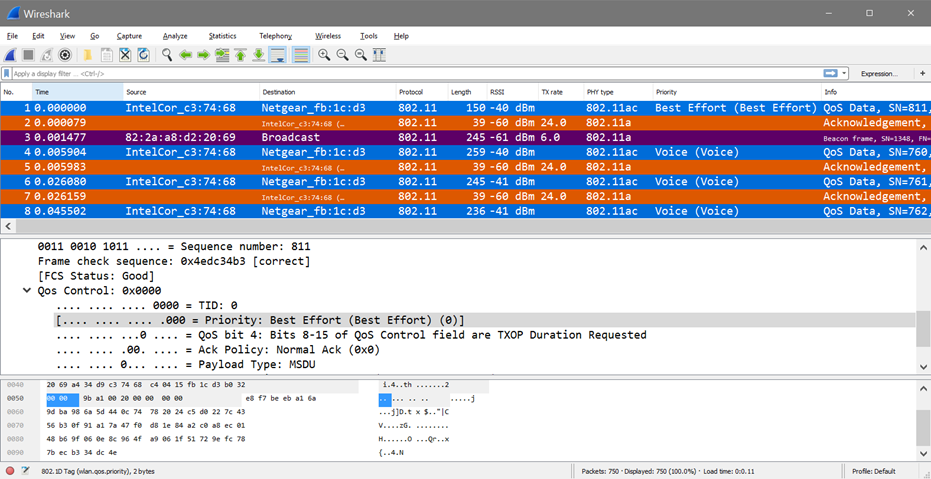
Our Wireshark display should now look like this, showing our new 2 columns:
If we now go back to our column preferences, we can see our new column definitions and re-order and rename them if desired. (Edit > Preferences > Columns):
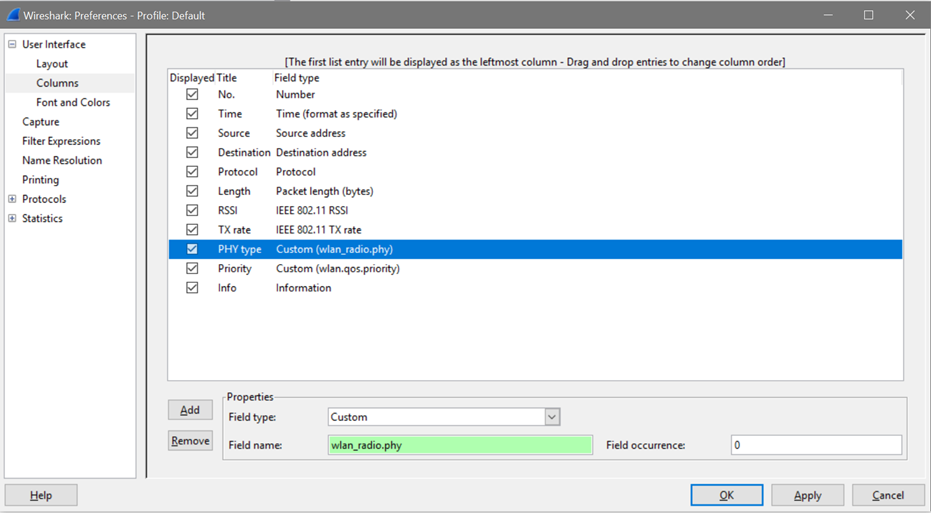
One caveat to the information process presented in this article is that the fields that are available may vary slightly depending on your capture environment. For instance, you should see all the fields relating to 802.11 frame headers and content, but the 802.11 Radio and Radio Tap header information is specific to the capabilities of your capture setup and the additional frame information it can (or cannot) provide.
Obviously, the custom column feature can be used to provide a wealth of additional summarized information. By selecting any field within a frame capture, it’s possible to add columns to make the frame review process more informative. I’ll leave it up to the reader to experiment with this feature, but other valuable fields in a wireless environment include: retry bit, channel width and channel number. Enjoy!
References
 |
Final Columns ViewCredits
Thanks to Eddie Forero for telling me about this...I don't really know much about Wireshark, but guys like him make me look smarter by sharing their knowledge! :)
|